Creating and sending a MailChimp Campaign with custom HTML from SharePoint Lists using Microsoft Flow
In this post I want to show how to create, upload and send a MailChimp campaign from Microsoft Flow.
The basic premise is that I have content stored “somewhere” that I want to automatically include in my MailChimp monthly newsletter. In this case my data is in SharePoint Online lists but it could come from any source (or combination of sources) that Flow allows you to connect to.
Connectors
Firstly, there “is” a MailChimp connector available in Flow. Yay!
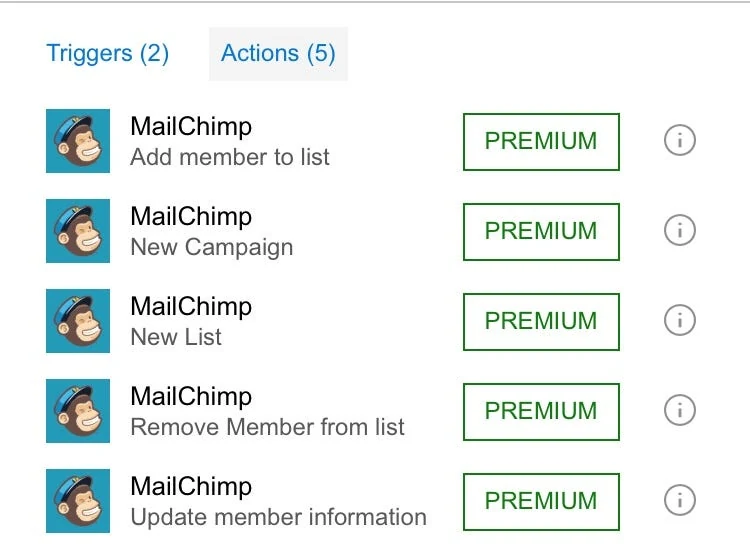
But it doesn’t let me do what I want. Boo!
I have the capabilities to do some basic list management, which works great and I use this in other Flows and I can create a campaign. But the create campaign is basic and only lets me use templates that already exist. So, unless all my data comes from a single RSS feed I can’t customise my newsletter HTML and I can’t actually send it.
HTTP to the rescue
Flow has a HTTP connector that, quite simply, lets me send a HTTP request and get a response.
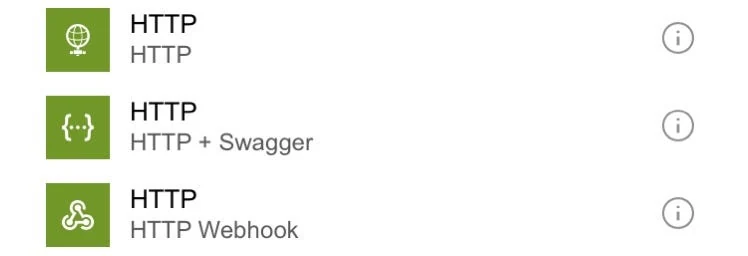
This example will use the basic HTTP request option, but if you are into Swagger or Webhooks, they are available here as well.
Rise of the APIs
It seems that most major online services now offer an API into their systems. Which is nice. MailChimp is no different and luckily it’s a nice RestFull API.
You can find out about the MailChimp restfull api here: https://developer.mailchimp.com/documentation/mailchimp/guides/an-introduction-to-rest
And an overview of the API endpoints are here: https://developer.mailchimp.com/documentation/mailchimp/reference/overview
Authentication
Before we can query our MailChimp account we need to be able to authenticate to it. MailChimp offers 2 ways of authenticating: OAuth 2 and HTTP Basic Authentication. In this case the most simple method for me was to use HTTP Basic Auth. This method means I can register an API Key in MailChimp and use that to request an Access Token and it’s that token that I pass to each of my requests. The following link explains how to create a new API key. https://mailchimp.com/help/about-api-keys
We could request a new token each time we run the Flow but the MailChimp documentation states that the access tokens never expire, so I made the first call for my access token using the awesome Postman tool. This curl example shows how to get an access token:
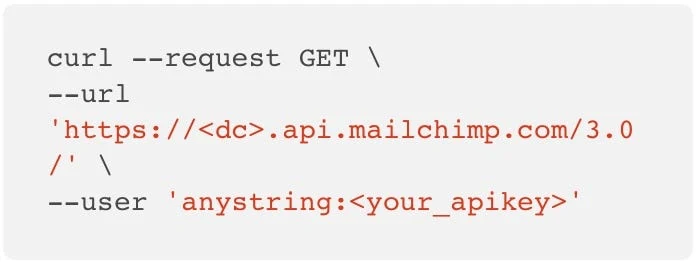
<dc> is the datacenter where your account resides and can be found by logging into your account in a browser. You will see this element in the url. And you just replace <your_apikey> with the API key you created above. In the response of this request you will find your Basic Authentication Token and you add that to your HTTP actions in the header.
Get your Flow on
Ok. Now that we have set up the authentication elements we can start to build our Flow.
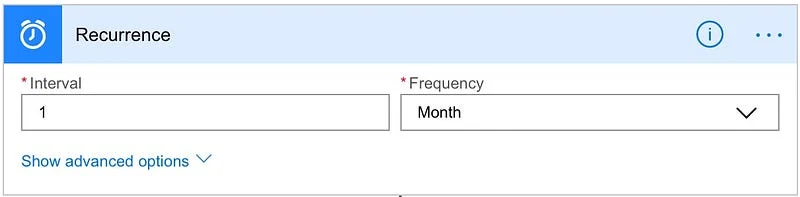
Firstly we need a trigger. This is a monthly email so I will use a scheduled trigger and set it to fire once a month.
Next, we need a variable to hold our newsletter html template.
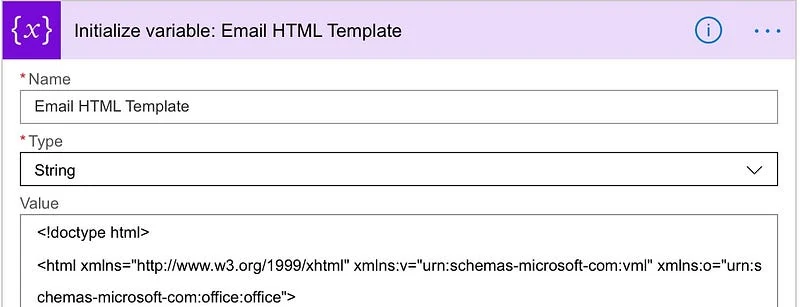
This is “very” long and fortunately our string variables let us put in very long text.
I get my Newsletter html by creating one directly in MailChimp, saving it as a template and then exporting it. This saves the raw HTML to my local machine that I can copy and paste into my variable. Since I want to dynamically set sections of my HTML (such as news or events) I “tokenize” my HTML. For example, I have a section where I want to add Azure Updates so I strip out my sample html and add a token:
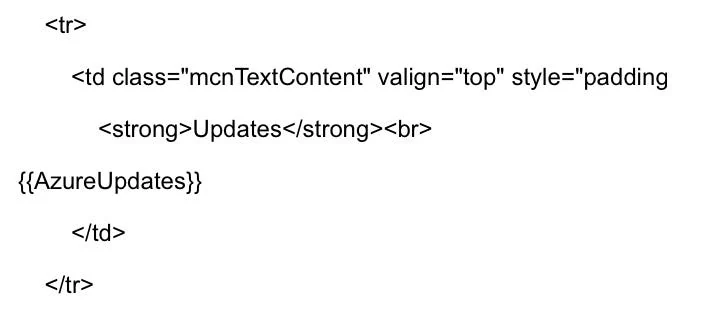
Now, later on in my Flow I can replace this token with the actual HTML that needs to be in that section. And I can repeat that as many times as I like.
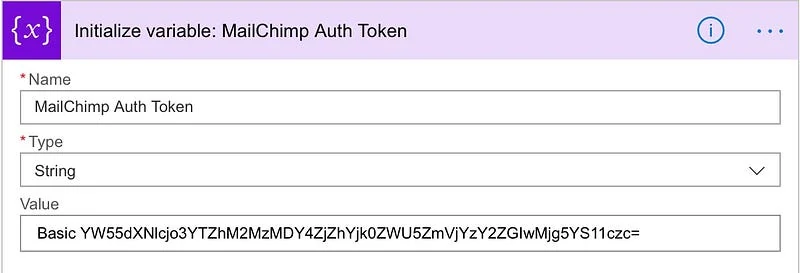
Next up, a variable for my MailChimp Authentication Token. I could embed this directly in my HTTP actions, but if I ever do need to change this (such as straight after creating a blog post where I share my token!) I only need to change it in one place.
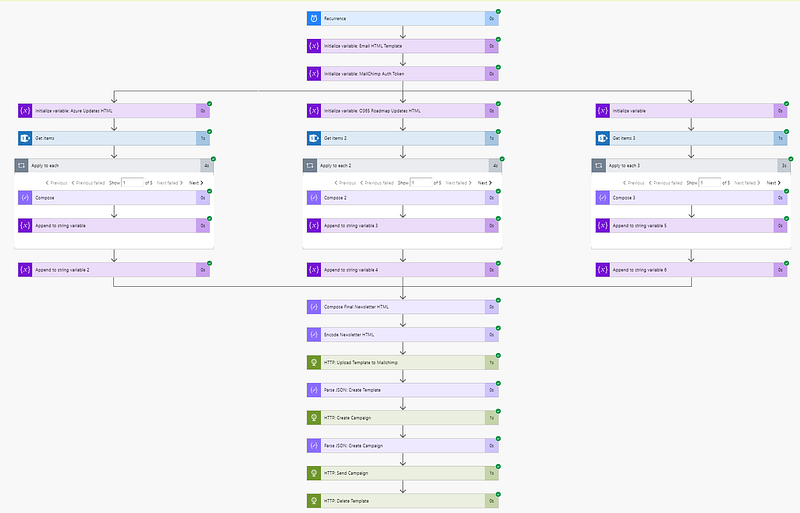
In this example I have three sections of news that I want to include in my newsletter. I could process these one section at a time, but since one has no dependency on another I can create parallel branches so they all run at the same time. Because this is a background process it really doesn’t matter how long it takes to run (within reason) so there’s nothing wrong with stacking these events on top of each other. But the developer in me likes to keep things neat and tidy.
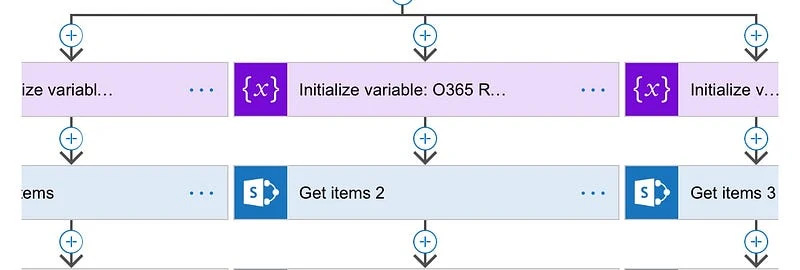
Once all these parallel branches complete the Flow continues to bring them all together into my template.
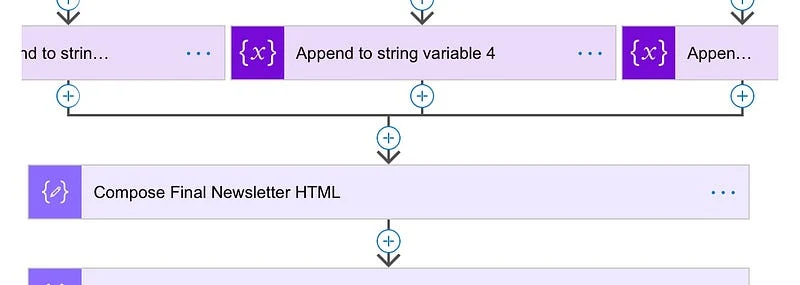
Back to the parallel branches. What do we do for each section?
Firstly, we create a string variable for our section code. This starts with a HTML Div element.
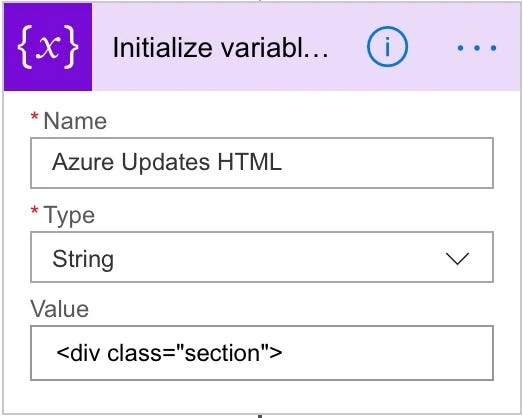
Next, I want to get the 5 most recent items from a SharePoint List, ordered by the date the items were published in descending order, ensuring I get the most recent 5 items.
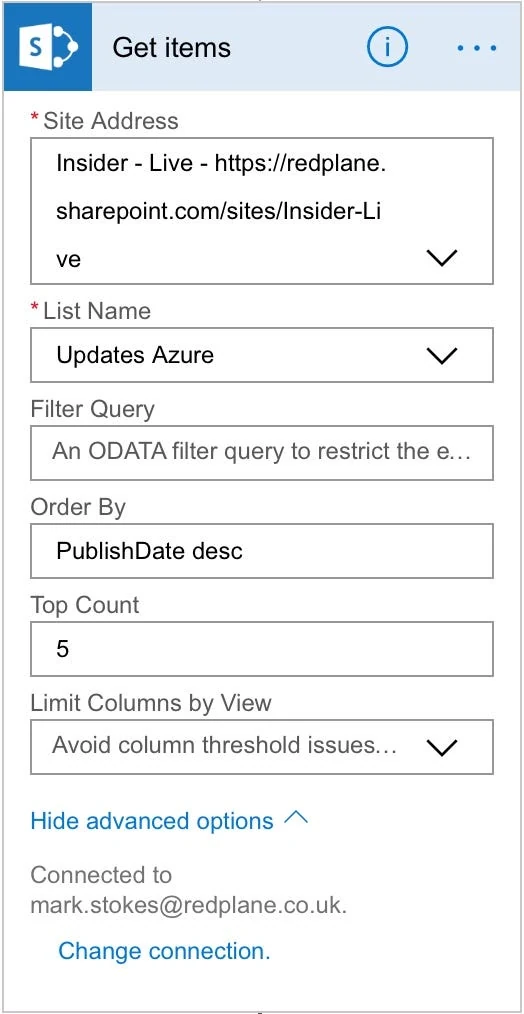
After we Get Items from SharePoint we need to loop over the data returned. So we create a Apply to each action.
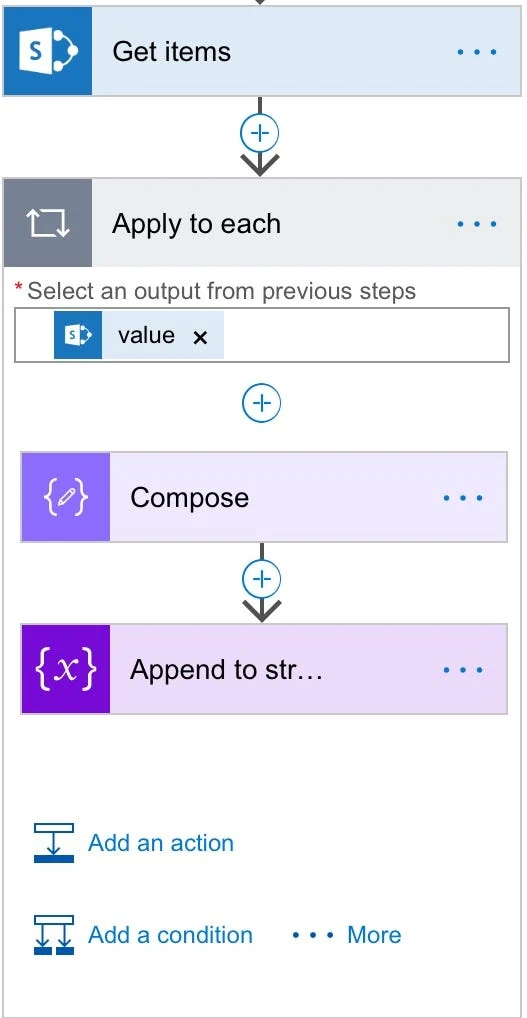
For each item we want to include we generate the right HTML and append it to our Azure Updates HTML variable.
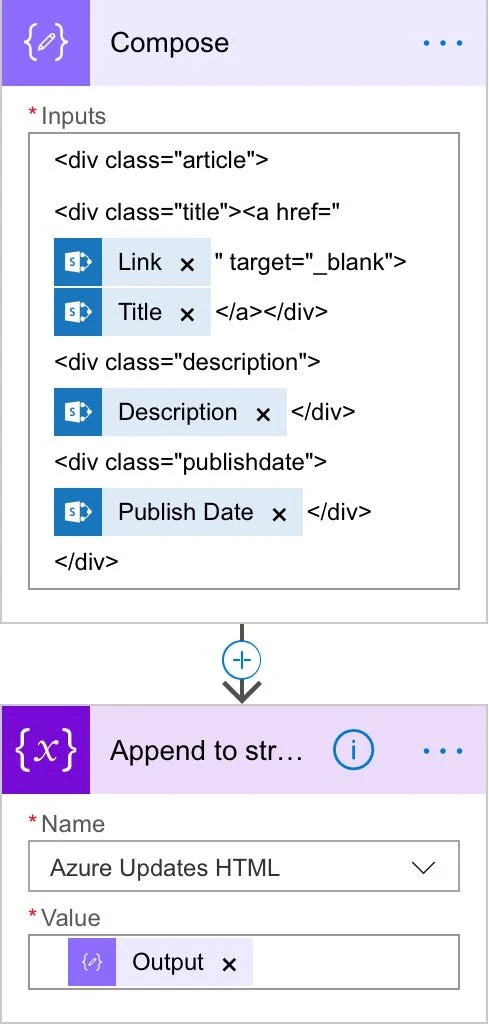
I use a Compose action to generate the item HTML. I like this as a simple way of putting together complicated string patterns that don’t need updating, opposed to creating lots of variables.
Lastly, I add a closing Div to my section HTML.
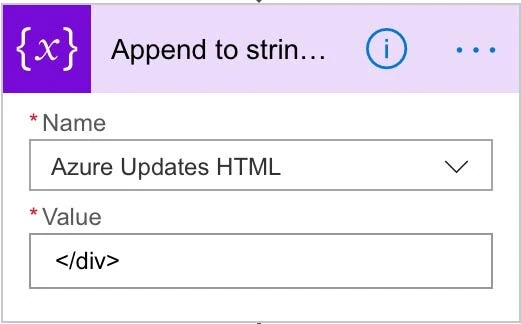
I could probably streamline this and have more variables and templates, but frankly, why bother? I said above I like nice clean code, but there are limits and this I can live with.
All three of my get dynamic content branches work exactly the same. They just load in different SharePoint lists.
When the three branches have completed I start to compose my final newsletter HTML.
I use a compose action to replace my tokens with the HTML that I want to display.
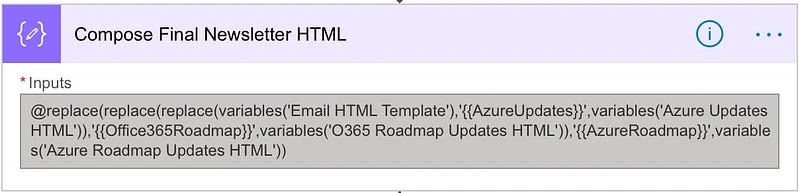
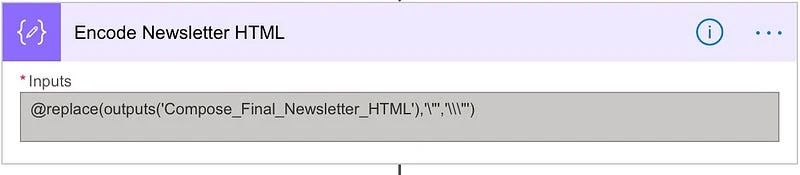
Now I need to “encode” certain characters of my HTML code to send up to MailChimp otherwise we get some weird behaviour.
Sending data to MailChimp
As I mentioned earlier, I can’t use the MailChimp connectors to create and send a campaign with dynamic HTML so I am reverting back to the HTTP actions.
First thing we do is create a new template with our custom HTML.
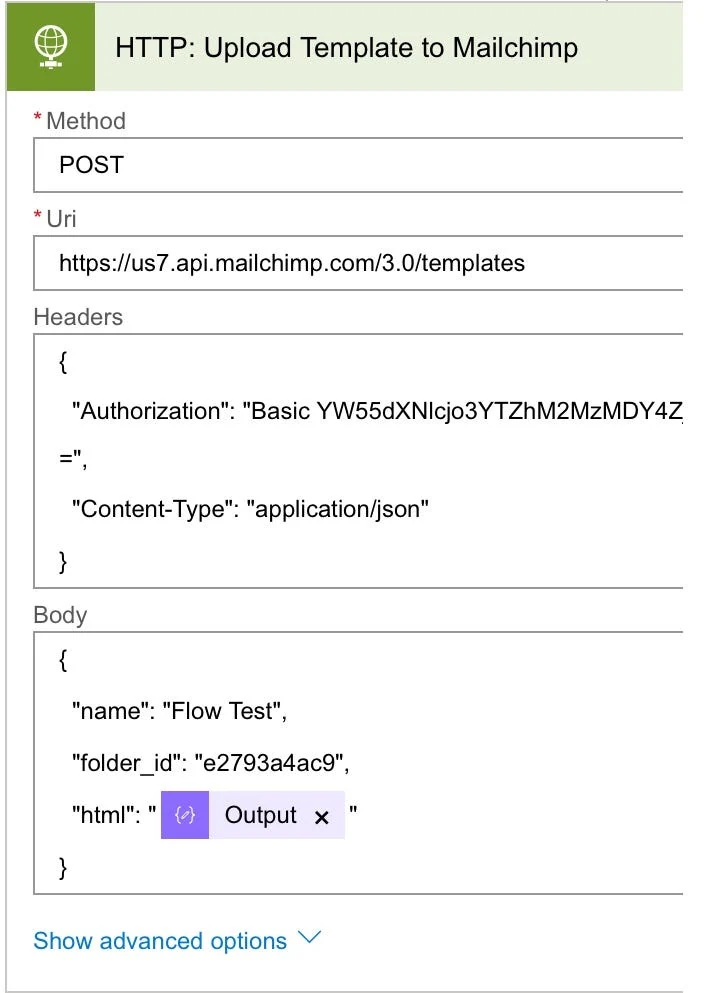
You can see here the URL and Method (POST) we use. Then you can see how we pass the Authentication Token (yes, I created this post before using a variable for my tokens). And lastly, you can see the JSON we send for the template. I give it a name (I delete it later so it can be anything) I also pass an optional folder_id. I send newsletters for a number of “customers” so I use folders extensively in MailChimp but this is optional.
When this sends we have a template in MailChimp with our dynamic HTML.
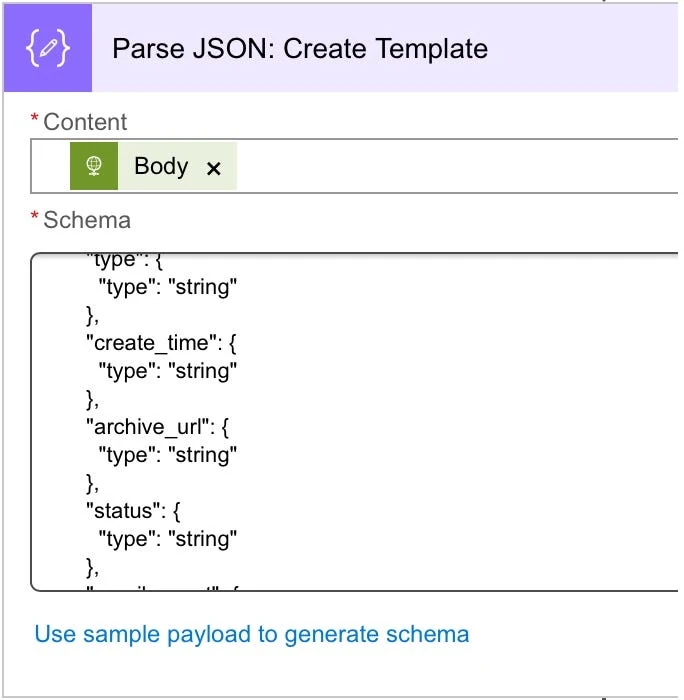
The HTTP action returns me some JSON which describes the template I have just uploaded, including the template ID which I will need later on. So, I use a Parse JSON action which allows me to reference the returned data by its property names. I don’t have a schema for the JSON but the parse JSON action has a really cool feature where I can paste a sample response and it creates the schema for me. I tend to use Postman to test my calls out and I get my sample response JSON from there.
Next, we can create the campaign. I could probably use the MailChimp connector for this but since I’m in a HTTP pattern I may as well stay here.
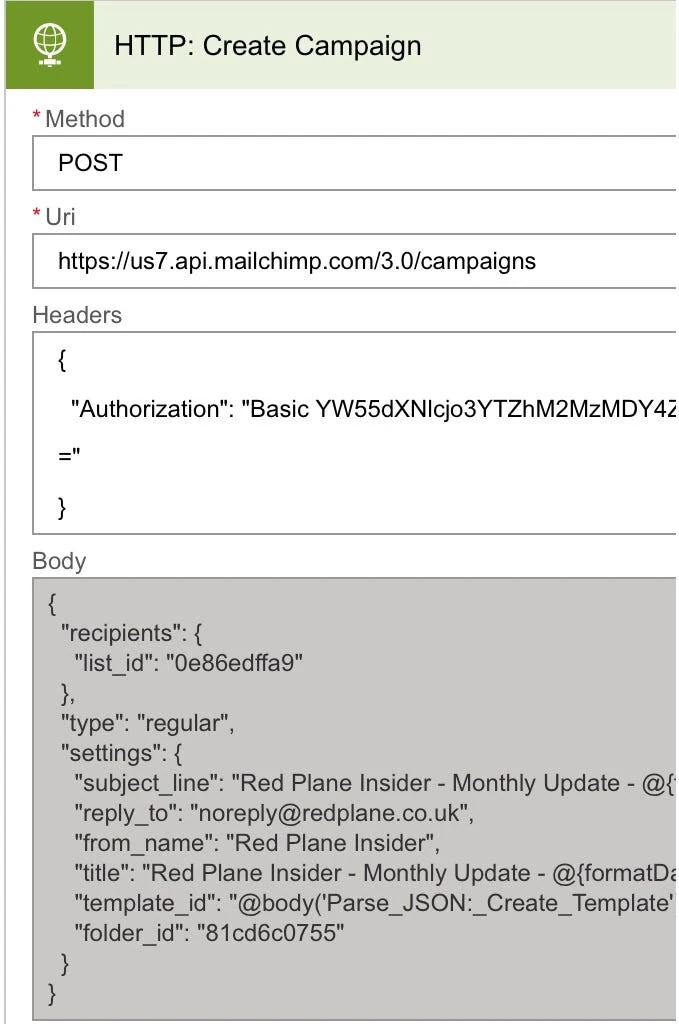
I send some of the basic properties for my campaign. There are lots more, but this is a good starting point. We POST our request to the campaigns API endpoint which tells MailChimp that we want to create a new campaign. A couple of lines to note.
“subject_line”: “Red Plane Insider – Monthly Update – @{formatDateTime(utcNow(),’MMMM yyyy’)}”
The expression here gives me a text value of the current Month and Year (July 2018)
“template_id”: “@body(‘Parse_JSON:_Create_Template’)?[‘id’]”
This is where we get the template Id from the previous Parse JSON action.
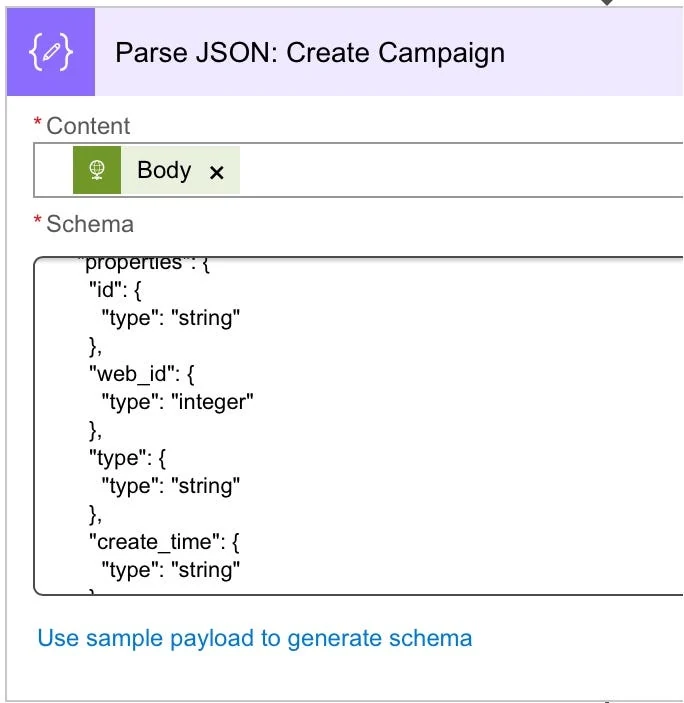
In the same was as before, we parse the response JSON so we can easily read it later.
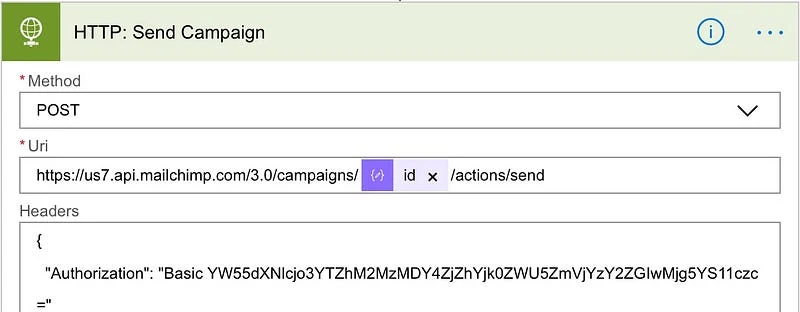
Next up, we send a send command to the campaign endpoint specifying the Campaign Id retrieved in the last Parse JSON action.
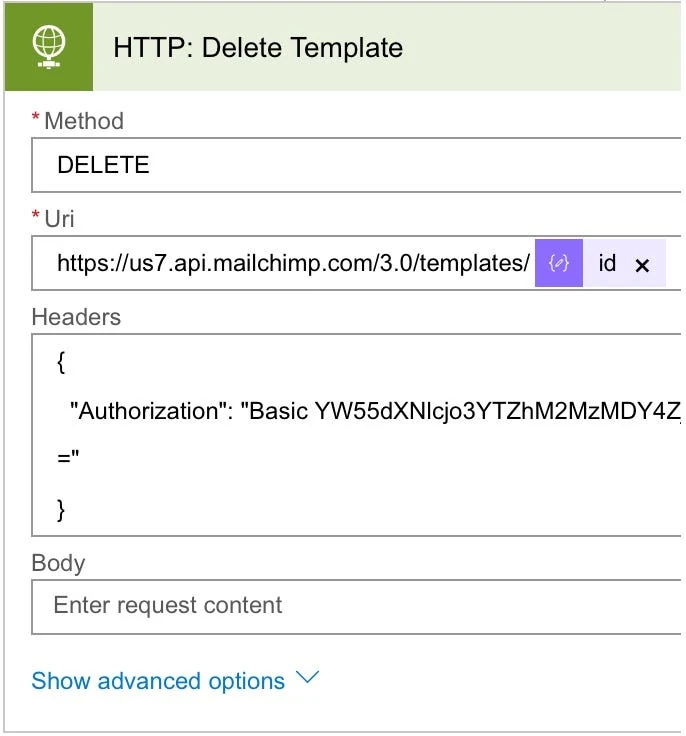
To finish off I want to send a DELETE command to the template to, well, delete it. We have the campaign HTML in the campaign itself so we don’t need to keep the templates.
Now we can log into MailChimp and look at our lovely opens and click stats go through the roof.
Enjoy.